Table of Content
Before Getting Started
IronBand (see updates / change log)
Before we dive in, we want to thank you for your interest in our themes and our work. Respect!
Let’s go over the minimum requirements that you will need in order to have a fully functioning site running our theme.
- A Hosting Server
- A copy of WordPress
- An FTP program (Filezilla, Cyberduck etc)
- The theme files that you downloaded from themeforest.net
If you already have a working install of WordPress feel free to skip ahead to theme installation.
Requirements & Compatibility
Our themes are compatible with the WordPress versions 3.6 and later (PHP v.5.2.4 or greater; MySQL v.5.0.15 or greater).
Most JavaScript enabled Browsers will make them work with no issues.
Our theme have been tested in:
- Google Chrome (Mac and PC)
- A copy of WordPress
- Firefox (Mac and PC)
- Edge (Mac and PC)
- Safari (Mac and PC)
Installation
1. Install WordPress
Download and Install WordPress.
To Install WordPress please follow the instruction here: http://codex.wordpress.org/Installing_WordPress
YOU CANNOT INSTALL WORDPRESS THEMES ON A WORDPRESS.COM BLOGGING ACCOUNT
It’s important to understand that an account on WordPress.com is not the same as a website running a self hosted copy of WordPress.
If you have purchased a theme with this intention you should contact envato support.
2. Download Theme
A. If you’ve downloaded whole theme package (see image below), unzip it. There you will find 3-4 folders such as:
- Documentation
- PSD
- Theme
Open the theme folder and you will find 2 zip files:
- ironband.zip (this is the theme you need to upload)
- ironband-child.zip (see child section for more info about child theme)

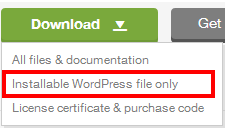
B. Alternatively you can simply download the installable WordPress file (see image below) You should have the themeforest-5398241-ironband-music-band-dj-wordpress-theme-wordpress_theme.zip archive by itself, which is the file to upload directly via the dashboard.
3. Install Theme
To install the theme, in your WordPress Admin Panel (wp-admin) go to “Appearance > Themes > Add New > Upload > browse to your .zip file. (see image below).

Please note that some hostings have a restriction on a size of a file that you are uploading. If any warnings appear, most probably, your hosting has file size limit. And the theme .zip file is too large to be uploaded via WordPress Panel. You can try contacting your hosting provider and ask to ease this restrictions.
Otherwise you can install theme via FTP. Simply unzip the installable file and upload the theme folder via FTP into “your_site/wp-content/themes/”.
For more info and help on installing the theme via FTP, follow this link.
Attention! Theme will work fine on the vast majority of correctly installed and configured WordPress sites without any additional settings. However on some (very rear) hosting configurations you can notice that images on your site are not displaying. If you are experiencing this issue, please follow these steps to fix it:
1. Make sure that theme installed strictly to “your_site/wp-content/themes/” folder.
2. The folder “your_site/wp-content/uploads” must be created. On some hostings you’ll need to set its CHMOD to 755, on others – to 777.
If above steps did not yield any results, please don’t hesitate to address this issue directly to yourhosting company. Since this is most likely a server-related problem, we will not be able to help you!
4. Activate Theme
In “Appearance > Themes > activate the theme by hitting the correspondent “Activate” link.
Attention! To assure your permalinks are being rendered correctly (the web-site does not return “404 Not Found” error) after switching the theme, follow “Dashboard > Settings > Permalinks” and click “Save Changes”.
5. Install Plugins
After theme activation you will see a “recommended plugins” notice. Click the “Begin installing plugins” link in order to proceed to installation. Make sure you activate them after installation.

Import our live demo !
Import our live demo is the best way to start with the theme.
This allow you to see how we built layouts and use elements through the theme. Then you can delete the content you don’t want, or replace our content with your.
We’ve built an tool to automatically import all the content and setting that you have seen on our demo.
Attention: This will option will FLUSH all your current content, data and images. It will completely replace your actual website by our demo’s content!
To import our demo, go to Ironband > Import Default Data > In the drop-down, select the “demo” you want then click Import default data.

* Depending your server speed, this can take up to 3 minutes. If it has spins for over 15 minutes, you might have server issues.
When import has finish, you are all set !
If you have issue and you can’t import our default data using this tool, here’s an alternative. Our theme option’s Import Default Data button might not work on some server. It sometimes happen with some server and error is actually unknown. Usually, it’s a security permission.
Use the default wordpress importer (tools > import > wordpress). You might have to install the plugin if you are using it for the first time. Then, you will be able to import the XML file (which is located in ironband/import/)
General Guidelines
Make a Page your Homepage
- Navigate to the “WP-admin > Settings > Reading” interface (see image below).
- In the “Front page displays” section choose “static page” radio-button.
- In the “Front page:” selector choose the page that you have created to be the Homepage.
- Optional. Also you can choose which page will display your blog posts in the “Posts page:” selector.

Import Dummy Content
We have set a tool to allow you to automatically import all the content, settings and images that you have seen on our demos.
If this option do not work or you prefer import dummy content manually here’s how:
Use the default wordpress importer (tools > import > wordpress). You might have to install the plugin if you are using it for the first time. Then, you will be able to import the XML file (which is located in ironband/import/)

Assign posts to an existing user. Then check “Download and import file attachments”. Then click submit.
Disable Comments
To hide comments on specific pages or post, go to “WP-admin > Pages > Edit your page”.
Simply check the “Discussion” checkbox in Screen Option – corresponding “Discussion” box will appear. Then uncheck “ALLOW COMMENTS”.

Font Awesome Icons
Here’s how to add Font Awesome icons:
- Navigate to Font Awesome Icons site: http://fontawesome.io/icons/
- Click on desired icon. Icon individual page fill open. E.g. this: http://fontawesome.io/icon/smile-o/
- Copy the code and paste it to corresponding field in menu. E.g.
<i class="fa fa-smile-o"></i>
Theme Options
Pagination Settings
This theme option page allow you yo set how many items you want to see in the page template before showing a paging.
Please note that this doesnt apply to widgets. This only apply to:
- Event Template
- Video Template (List and Grid)
- Photo Albums Template (List and Grid)
- * For posts (or news), see below…
To set how many items you want to display in the blog template, go to Settings > Reading.
You have 4 different options for the pagination of your page templates.
- Displays links for next and previous pages (e.g. : « Previous Page — Next Page »)
- Displays a row of paginated links (e.g. : « Prev 1 … 3 4 5 6 7 … 9 Next »)
- Displays a single link to dynamically load more items (e.g. : « More Posts ») (AJAX)
- Dynamically load more items as you scroll down (infinite scrolling) (AJAX)
How can i change the number of posts per page ?
Go to Settings > Reading. You will see the setting beside: “Blog pages show at most” (http://d.pr/i/gj2i)
Widgets Areas
Manage your WordPress Widget Areas and additional settings related to page templates and widgets.
This allow you to create widget “zone” or “group” to use later on in different section of your site (Appearance > Widgets)
The drop downs such as Single Post Default Sidebar, Single Video Default Sidebar, Single Event Default Sidebar, etc, apply ONLY to NEW post. When you create a new post (or event or video or photo album, etc..) this will set a default sidebar automatically instead of selecting which sidebar you want for your different post templates.
Header and Logos
it’s in the header section that you have to set your logos.
In Ironband, we use 2 different logos.
- The header logo (and its retina logo) is used in the header of the website.
- The menu logo (and it’s retina logo) is used in the menu when you open it.
If you want to have transparency in your logo, you must upload a PNG logo with transparency.
Look on YouTube for tutorials: “How to make a transparent logo PNG”
Quick tips about Retina logos:
When people visit your website using a retina screen (such as iPhone 5, iPads, or new Apple’s products) they will see the retina logos. The retina logo is as simple as a TWICE bigger logo than your regular logo. So if your regular logo is 200X100 your retina logo should be 400X200 then we take care to display it 200X100 on the website so it will looks very sharp on retina displays.
Post Settings
These options apply for all the single post.
You have the option to have the featured image shows in every post by choosing 3 options:
- FullWidth will stretch your featured image to appear fullwidth in your template
- Original will not stretch your featured image. It will use your original uploaded image.
- None will hide the featued image on every post.
The rest of the options are pretty straight forward.

Social Media
To add social media icons
Go to Irondband > Social Media > Add Social Media
We use Font-Awesome for the preloaded icons. If you Font-Awesome do not provide the icon you want, you will have to upload it manually (see step 6)

Sharing Option (Add This)
To use ADD THIS for your content sharing, please refer to the addthis.com website on how to use this feature.
To embed your Add This (or Share This) buttons, just paste the code they have provided you into the Custom Social Buttons field.
Footer Newsletter
To enabled/disabled the newsletter horizontal bar in the footer , go to Ironband > Footer Newsletter.
To know more about the newsletter widget, please refer to the NEWSLETTER section in this user guide.
Content Manager
Events
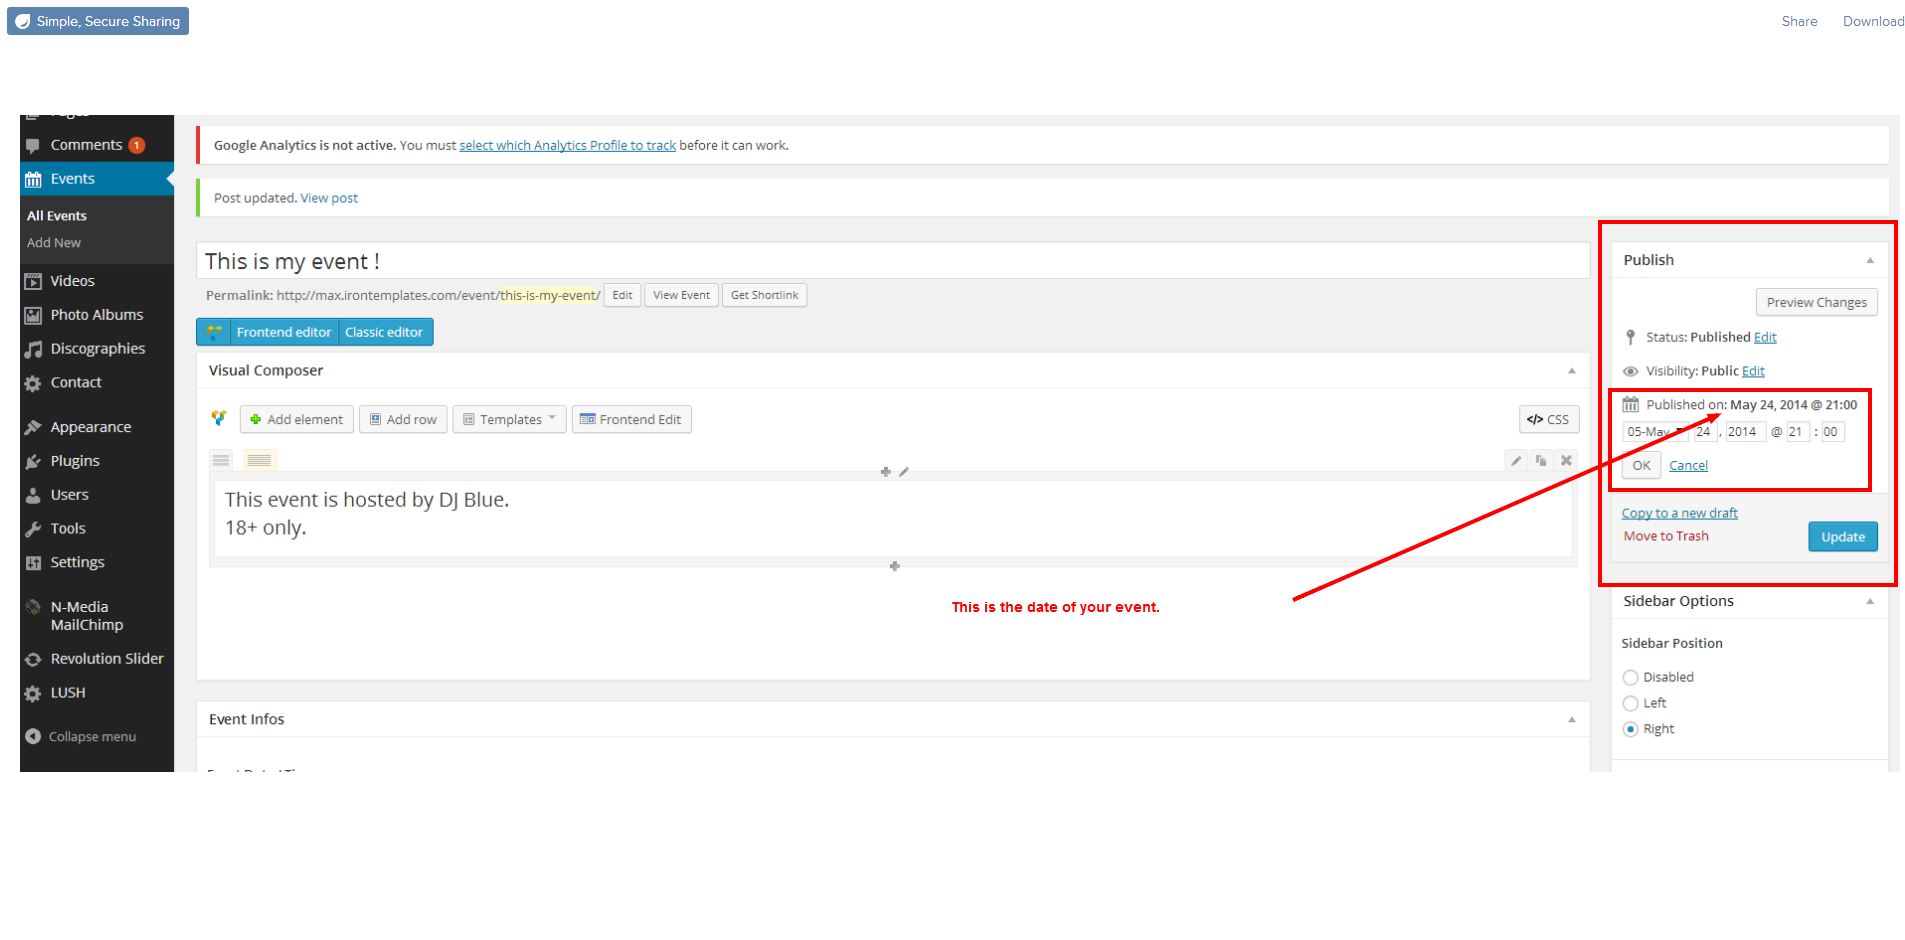
Set the Date
To set the date of your event, edit the publish date of the post.
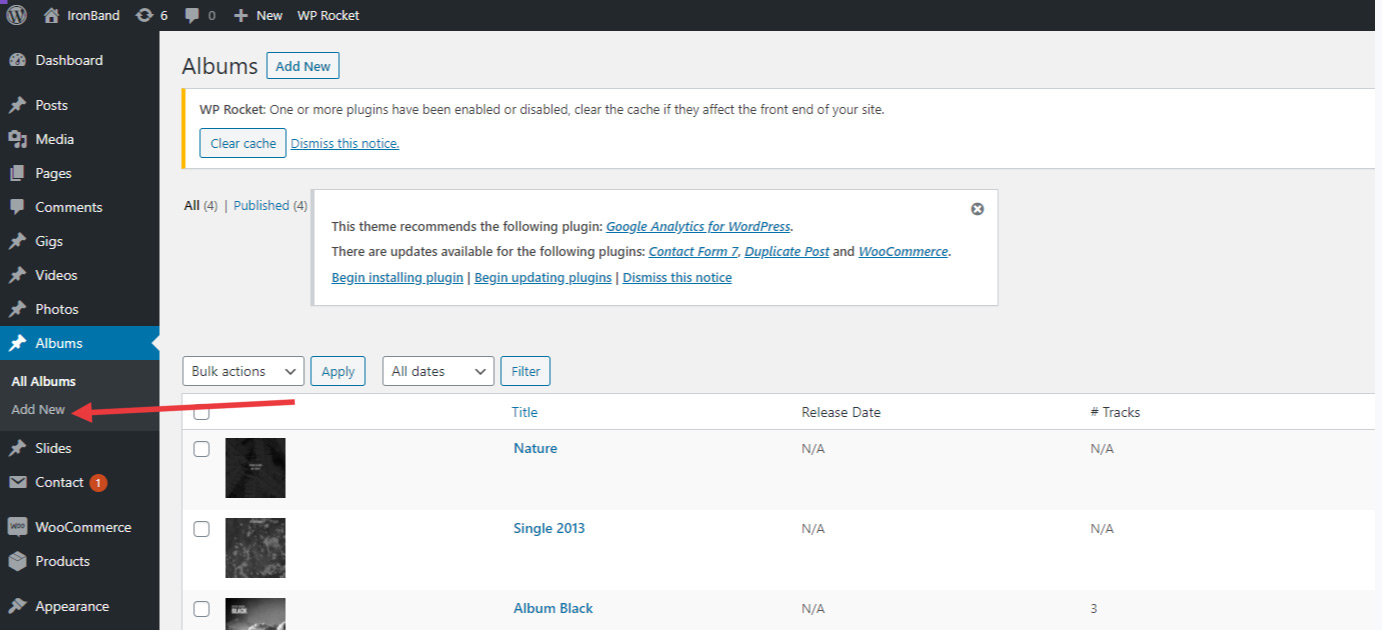
Adding a new event
See screencast below:
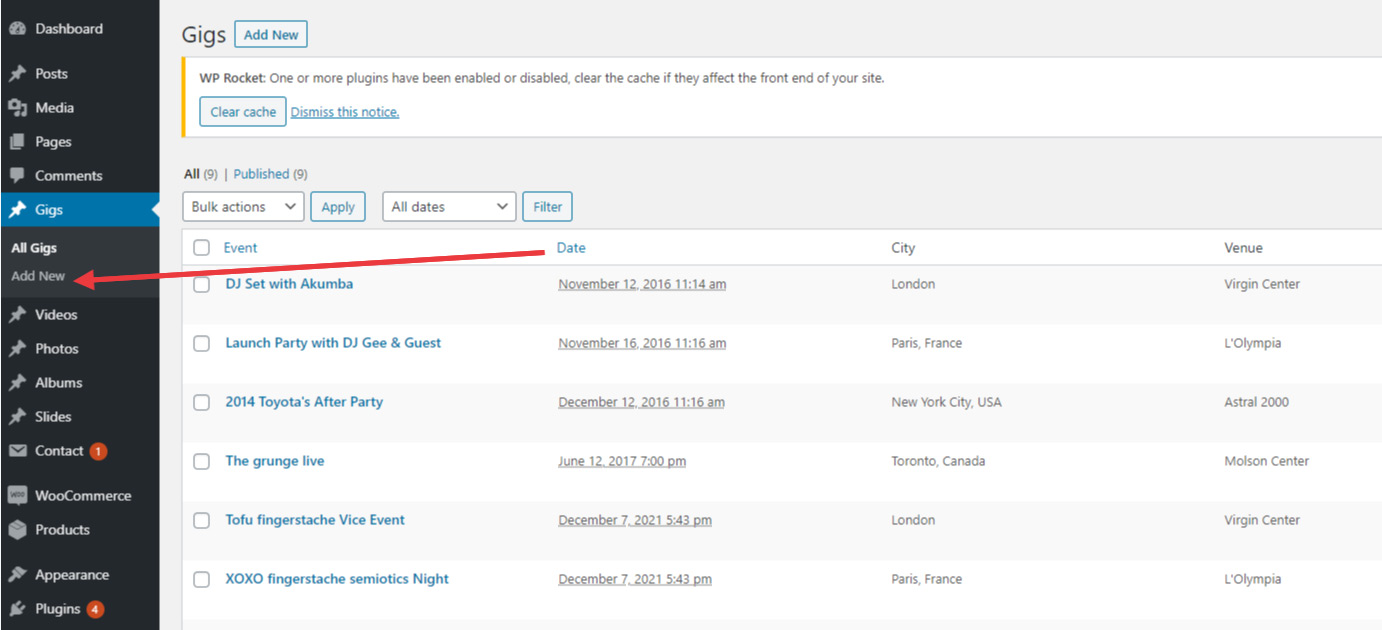
Managing Past events from Upcoming Event
Ironband will automatically set your event as a PAST event when its date is older than today. If you set your gig’s date as a date that will take place, it will be considered as an upcoming event. If the date is older than “today”, it will be recognized as a Past Event.
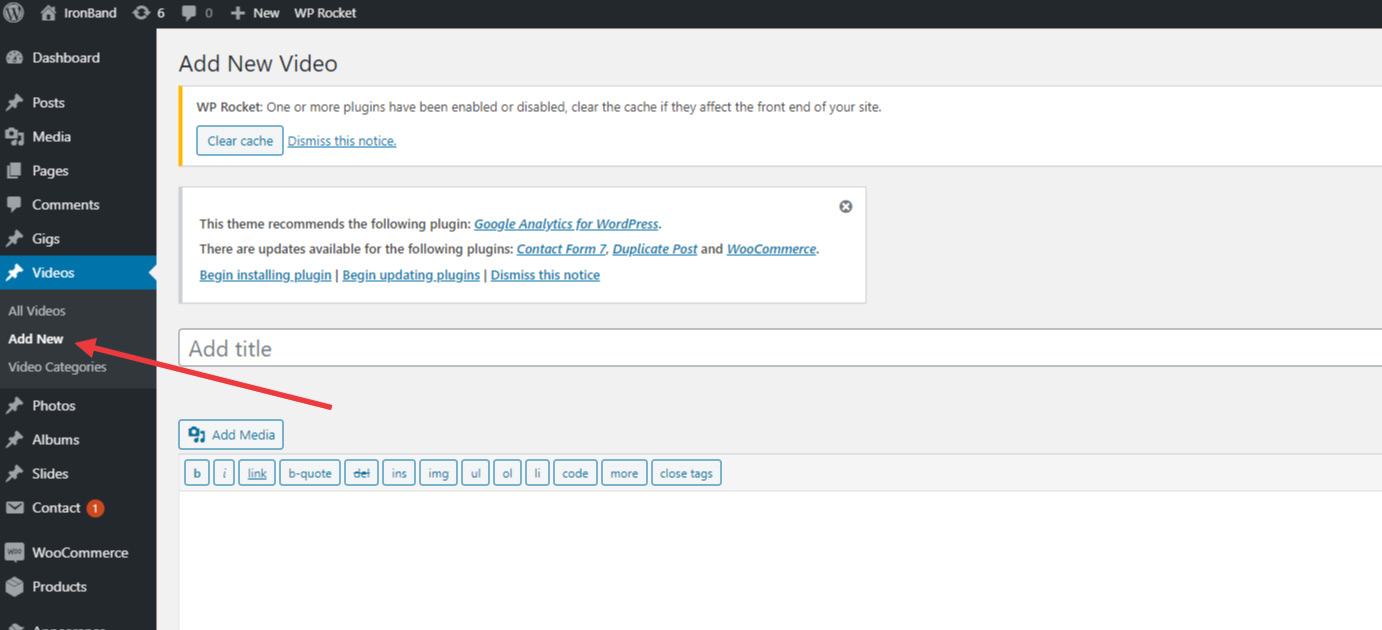
Videos
To add a video, see screencast below:
Discography
See Screenshot below about adding a new album to your discography: